Van Conversion Pitfalls: Common Mistakes to Avoid
 Converting a van is exciting , it’s your chance to create a rolling home that’s 100% yours. But here’s the truth: plenty of DIY builds go wrong. People waste thousands, cut corners, or worse end up with unsafe setups that ruin the dream.
To save you from those headaches, I’ve pulled together the most common van conversion mistakes to avoid. From poor planning and dodgy wiring to weak insulation and bad layouts, I’ll show you what not to do and how to get it right the first time.
Key Takeaways:
Avoid costly van conversion mistakes by planning ahead and setting a realistic budget.
Proper insulation and ventilation keep your van comfortable in any season.
Safe wiring, batteries, and storage design make life easier and safer on the road.
Don’t cut corners on safety; secure furniture, add detectors, and protect your build.
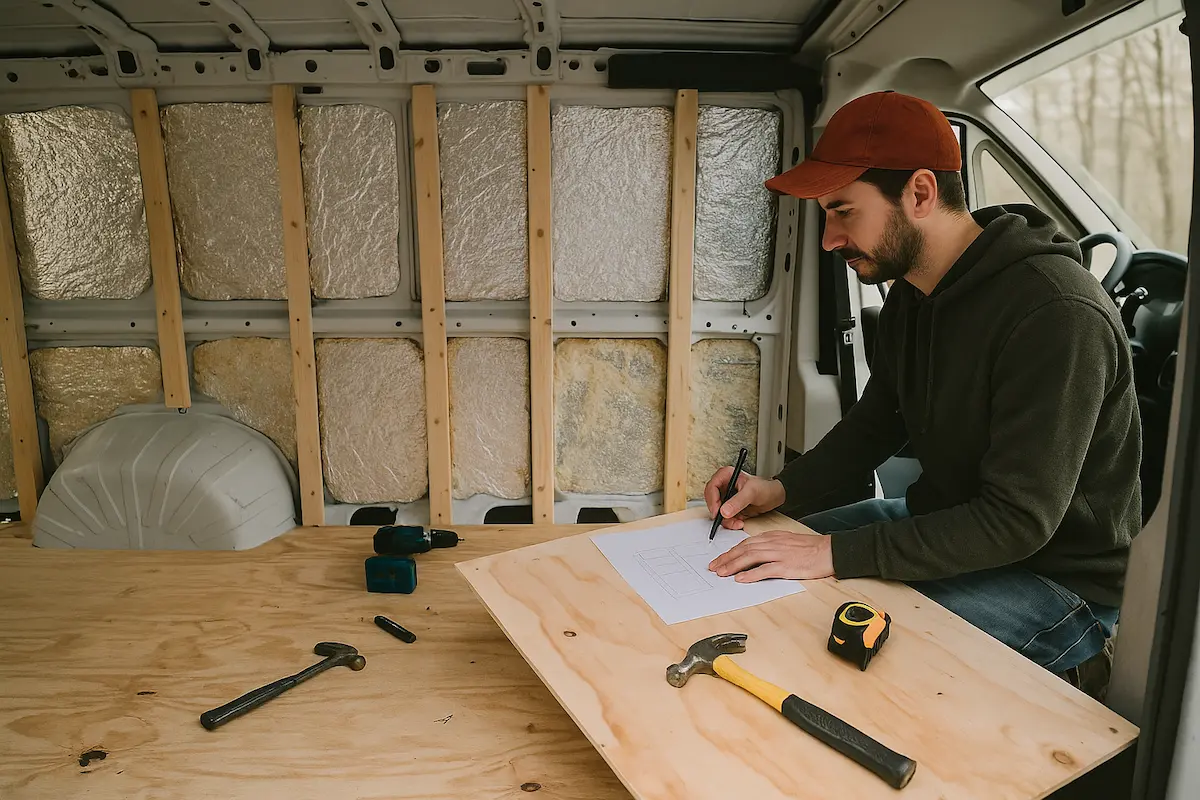
Lack of Proper Planning
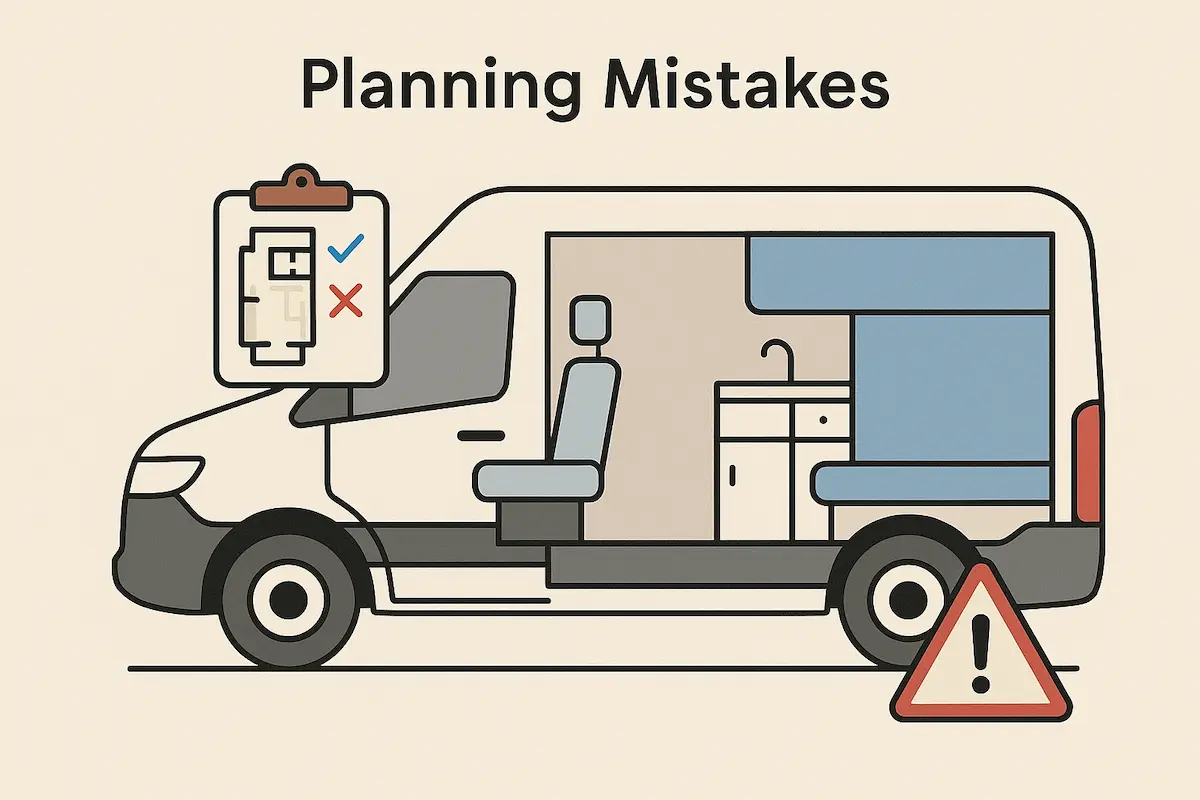
One of the biggest van conversion mistakes people make is diving in without a solid plan. Skipping this step almost guarantees wasted cash, lost time, and design headaches later.
Why Planning Matters
A clear plan helps you set realistic goals, spot potential problems early, and map out the materials, budget, and timeline you’ll actually need. It’s your blueprint for a smooth conversion instead of a series of expensive surprises.
Smart Planning Tips
Define your needs: Weekend trips? Full-time living? A mobile office? Your van’s purpose drives every decision.
Sketch a layout: Even a rough floor plan helps you visualize space for sleeping, cooking, storage, and work.
Budget realistically: Research material and tool costs, and always allow a buffer for surprises.
Research first: Learn from others’ builds, note their mistakes, and adapt what works.
Build in safety: Plan for essentials like fire extinguishers, CO detectors, and secure fittings right from the start.
Common Planning Pitfalls
| Mistake | Consequence | Fix |
|---|---|---|
| Poor space allocation | Cramped or wasted space | Map out a floor plan before building |
| Underestimating costs | Blowing the budget mid-build | Add a 10–15% buffer for surprises |
| Skipping resources | Missing tools or parts mid-job | Create a full materials list in advance |
| Ignoring safety & legal rules | Fines, failed inspections, unsafe van | Research local laws and safety codes |
👉 Careful planning may not feel exciting, but it’s the difference between a van that works and one that constantly frustrates you.
Neglecting Proper Insulation
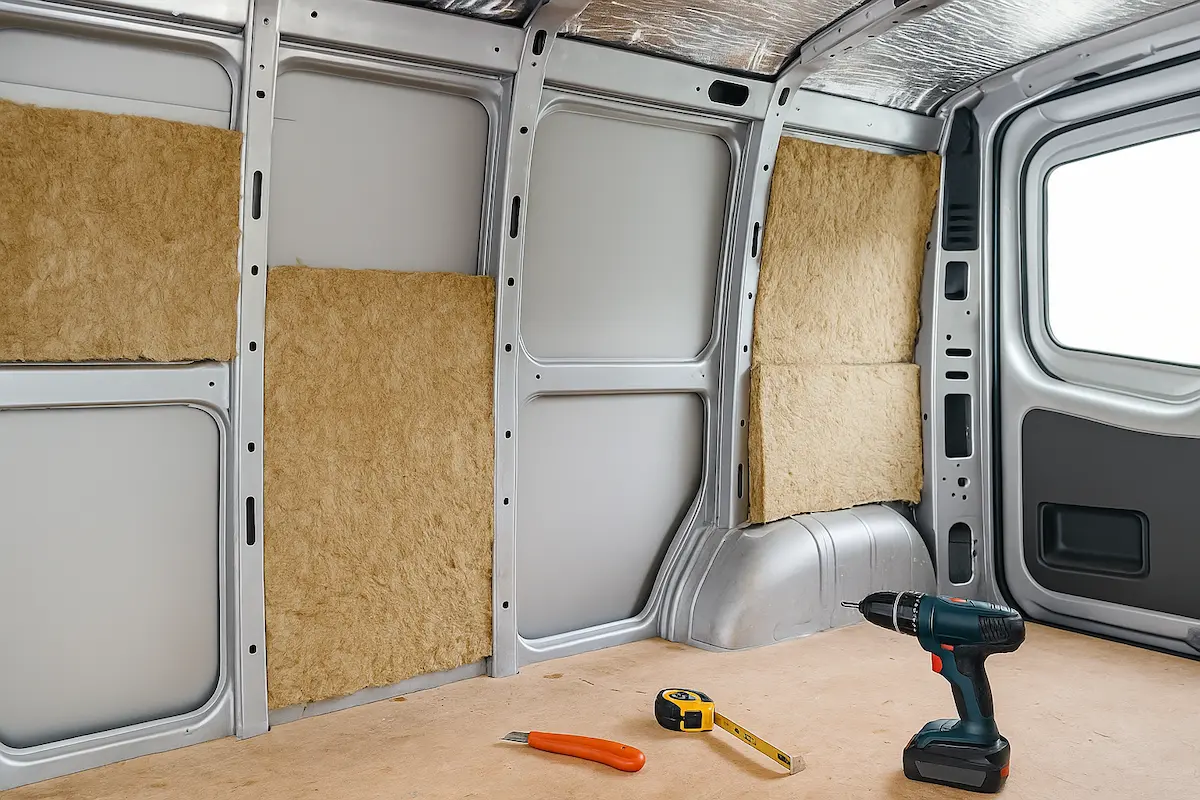
Skipping insulation — or doing it badly — is one of the most common van conversion mistakes. It might save time upfront, but you’ll pay for it later with freezing nights, sweltering days, and sky-high energy use.
Why Insulation Matters
Good insulation keeps your van comfortable year-round. It reduces heat loss in winter, keeps the heat out in summer, and even cuts down road noise. Without it, condensation builds up, leading to mold, rust, and an unhealthy living space.
Common Insulation Pitfalls
Using the wrong materials (cheap foam or carpet underlay that soaks up moisture).
Leaving air gaps that kill performance.
Forgetting “hidden” areas like wheel wells, ceiling, and floor.
Ignoring moisture control — leading to mold and rot.
Best Materials for Van Insulation
| Material | Pros | Cons |
|---|---|---|
| Spray foam | Excellent thermal seal, fills gaps | Expensive, usually needs a pro |
| Mineral wool | Fire-resistant, soundproof | Can be bulky, itchy to handle |
| Polyester | Lightweight, easy to fit | Needs thicker layers for results |
| Foil bubble wrap (Reflectix) | Good radiant barrier | Useless without air gap |
👉 Pro tip: combine materials. For example, use rigid foam board on large panels and mineral wool in tight spaces. Always add a vapor barrier to keep condensation in check.
Improper Electrical Setup
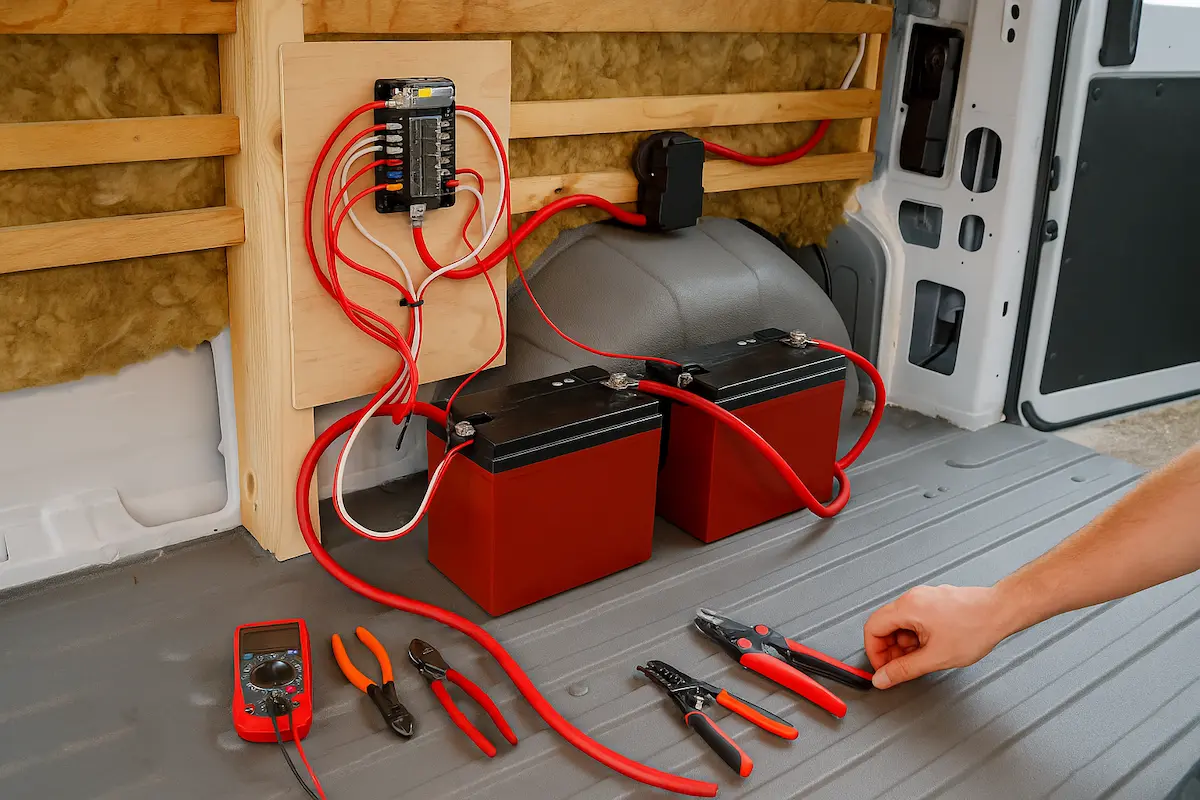
A dodgy electrical system is more than just inconvenient, it’s one of the most dangerous van conversion mistakes you can make. Bad wiring or the wrong battery setup can lead to blown circuits, constant power shortages, or even fires.
Common Electrical Mistakes
Using the wrong gauge wire or skipping proper grounding.
Overloading circuits with too many appliances.
Poorly secured connections that shake loose while driving.
Choosing undersized batteries that can’t meet your power needs.
Safe Setup Tips
Research first: Study wiring diagrams and learn the basics of 12V systems.
Use the right materials: Correct wire gauge, quality fuses, and proper connectors.
Plan your power: Match battery capacity to your fridge, lights, laptops, and other gear.
Install safety devices: GFCI outlets, surge protectors, and proper breakers.
Label everything: Create a clear diagram so you (or a mechanic) know how it’s wired.
Battery & Charging Pitfalls
| Mistake | Consequence | Fix |
|---|---|---|
| Undersized battery | Constant power shortages | Choose deep-cycle batteries sized for your usage |
| No isolator/management | Drains starter battery | Add a battery isolator or DC-DC charger |
| Poor maintenance | Short battery lifespan | Check levels, charge properly, monitor regularly |
👉 Bottom line: Don’t guess with electricity. Take time to plan, use the right gear, and if you’re unsure, consult a pro. A safe setup means fewer headaches — and a lot fewer risks.
Inadequate Ventilation

Poor airflow is one of the easiest van conversion mistakes to overlook and one of the most uncomfortable to live with. Without proper ventilation, you’ll face condensation, mold, bad smells, and stuffy air.
Common Ventilation Pitfalls
Forgetting cross-ventilation (windows or vents on opposite sides).
Choosing windows only for looks, not for sealing or function.
Installing a fan incorrectly — leading to leaks, noise, or poor performance.
Smart Ventilation Fixes
Plan airflow: Place windows or vents on opposite walls for natural cross-breeze.
Pick the right windows: Choose ones with screens, solid seals, and easy operation.
Add a roof fan: A 12V vent fan with variable speeds and reversible flow can keep air moving year-round.
Control condensation: Vent fans plus insulation reduce moisture buildup inside.
👉 A well-ventilated van is healthier, drier, and far more comfortable — especially when cooking, sleeping, or traveling in humid climates.
Insufficient Storage Solutions

Running out of space is one of the most frustrating van conversion mistakes. Without smart storage, your van quickly becomes cluttered, cramped, and hard to live in.
Common Storage Pitfalls
Ignoring vertical space and only using the floor.
Building hard-to-reach compartments.
Poor weight distribution, making the van unsafe to drive.
Forgetting to plan for your specific gear (tools, camping kit, clothing, etc.).
Smart Storage Fixes
Think vertical: Add overhead cabinets, shelves, and hanging organizers.
Go multifunctional: Beds with drawers, benches with hidden storage, fold-out desks.
Use modular systems: Flexible units you can reconfigure as your needs change.
Plan access: Make sure storage is easy to reach without moving everything else.
Balance weight: Distribute heavy items evenly across both sides of the van.
👉 The best storage isn’t just about squeezing things in, it’s about creating a system that keeps your van organized, safe, and easy to live in.
Poor Layout and Design Choices

A bad layout can ruin even the best van conversion. It’s one of those van conversion mistakes that’s easy to overlook until you’re living with it every day, bumping into furniture, struggling to cook, or constantly moving things just to get to your bed.
Common Layout Pitfalls
Poor furniture placement → Creates cramped, awkward spaces.
Inefficient flow → Hard to move between kitchen, bed, and seating areas.
Ignoring ergonomics → Leads to discomfort and back strain.
Forgetting natural light → Results in a dark, stuffy van interior.
Smart Layout Fixes
Plan before you build: Sketch floor plans and test different layouts.
Prioritize functionality: Design around your lifestyle, remote work, travel, or full-time living.
Maximize space: Use foldable, sliding, or multifunctional furniture.
Think about flow: Ensure clear walkways and easy access to essentials.
Use light: Add windows or skylights to bring in daylight and improve ventilation.
👉 A good layout doesn’t just look nice, it makes your van comfortable, functional, and enjoyable to live in day after day.
Overloading the Van

One of the most dangerous van conversion mistakes is ignoring weight limits. A van stuffed with heavy furniture, water tanks, and gear may look fine, but overloading puts huge stress on the engine, brakes, and suspension, and can even make the van unsafe to drive.
Why Weight Matters
Every van has a Gross Vehicle Weight Rating (GVWR) — the maximum weight it can safely carry, including passengers, fuel, and all your build materials. Go over this, and you risk:
Sluggish braking and poor handling.
Excessive wear on tires and suspension.
Reduced fuel efficiency.
Structural damage to the frame.
Smart Load Management
Weigh components: Keep track of the weight of wood, appliances, water tanks, and gear as you go.
Distribute evenly: Spread weight across both sides and axles.
Keep heavy items low: Store water tanks, batteries, and tools close to the floor.
Use secure storage: Prevent items shifting during travel.
Check regularly: Visit a public weigh station to confirm you’re within limits.
👉 Respecting your van’s weight rating isn’t just about protecting your build, it’s about keeping you and everyone on the road safe.
Neglecting Safety Measures
One of the most serious van conversion mistakes is overlooking safety. A van that looks cozy but isn’t safe to live in or drive puts you, your passengers, and others on the road at risk.
Common Safety Risks
Fire hazards → from bad wiring, overloaded circuits, or flammable materials.
Gas leaks → from poorly installed propane systems or appliances.
Unsecured furniture → cabinets, fridges, or gear turning into projectiles in a crash.
Smart Safety Fixes
Fire protection: Install smoke detectors, keep a fire extinguisher on hand, and use fire-resistant materials where possible.
Gas safety: Have propane systems professionally fitted, add a carbon monoxide detector, and check for leaks regularly.
Secure everything: Use brackets, bolts, and straps to lock furniture and gear in place. Add non-slip mats for shelves and counters.
Plan an exit: Make sure you have a quick way out in case of emergency.
👉 A safe van conversion isn’t just peace of mind, it’s protection for your investment, your health, and your life.
Underestimating Budget and Costs
One of the most common van DIY mistakes is underestimating the budget and costs involved in the conversion process. It’s essential to have a realistic understanding of the expenses you’ll incur throughout the project. Otherwise, you may find yourself facing unexpected financial challenges that could delay or even halt your conversion.
Creating a realistic budget is the first step to avoiding this blunder. Start by researching the costs of materials, tools, and any professional help you may need. It’s also crucial to factor in unexpected expenses that may arise during the conversion process.
When tracking the expenses, it’s beneficial to maintain a detailed record. By documenting each purchase and expense, you can keep track of how much you’ve spent so far and ensure you stay within your budget. This record will also help you identify any areas where you may be overspending or need to cut back.
Remember, it’s better to overestimate your expenses than to underestimate them. This allows you some financial flexibility to handle unexpected costs or make necessary adjustments to your plans.
Common Budgeting Mistakes to Avoid
1. Failure to research and estimate costs accurately: Research prices for materials, tools, and professional services to avoid any surprises when budgeting for your van conversion.
2. Forgetting to account for hidden costs: Remember to include expenses such as permits, inspection fees, insurance, and potential repairs or modifications that may be required.
3. Neglecting to allocate funds for contingency: Allocate a portion of your budget for unexpected expenses that may arise during the conversion process.
Sample Conversion Budget
| Expense Item | Estimated Cost |
|---|---|
| Insulation Materials | $500 |
| Electrical System | $1,200 |
| Flooring | $300 |
| Furniture and Fixtures | $1,500 |
| Appliances | $800 |
| Plumbing System | $700 |
| Decor and Accessories | $300 |
| Permits and Licenses | $200 |
| Contingency Fund (10% of total budget) | $530 |
| Total Budget | $6,030 |
Keep in mind that the costs provided in the table above are for illustrative purposes only and should be adjusted based on your specific conversion plans, preferences, and location. It’s essential to conduct thorough research and gather accurate cost estimates to create a budget that suits your needs.
By adequately budgeting for your van conversion and tracking your expenses, you can avoid the common mistake of underestimating costs. This will ultimately lead to a smoother and more enjoyable conversion journey without any financial setbacks.

Ignoring Legal and Regulatory Requirements
When embarking on a van conversion project, it’s essential to consider the legal and regulatory requirements involved. Ignoring these requirements can lead to significant complications and potential penalties down the road. In this section, we will explore the common pitfalls that van converters often encounter when it comes to legal compliance and provide guidance on ensuring a smooth and lawful conversion process.
Vehicle Registration
One crucial aspect of a van conversion is ensuring that your vehicle is properly registered. Each state has its own regulations regarding the registration of converted vans, and it’s essential to familiarize yourself with these requirements to avoid any legal issues. Failure to register your van correctly can result in fines, and it may even affect your insurance coverage.
Building Codes and Permits
Depending on the extent of your van conversion, you may need to comply with building codes and obtain necessary permits. This is especially true if you’re making structural modifications or adding plumbing and electrical systems. It’s crucial to research and understand the specific building codes and permit requirements in your area to ensure your conversion meets the necessary safety standards and regulations.
Insurance Considerations
During a van conversion, it’s crucial to notify your insurance provider of the changes you’re making to your vehicle. Converting a van may affect your insurance coverage, as it transforms the vehicle’s original purpose and potential risk factors. By informing your insurance provider, you can explore options for specialized coverage to protect your converted van adequately.
Compliance with Road Safety Regulations
Van converters must also consider road safety regulations and ensure that their modifications adhere to these guidelines. This includes aspects such as lighting, visibility, and signposting. It’s important to invest in proper lighting fixtures, reflective materials, and other safety devices to ensure that your converted van complies with road safety standards.
| Common Legal and Regulatory Requirements | Pitfalls to Avoid | Guidance for Compliance |
|---|---|---|
| Vehicle registration | Failing to register the converted van properly | Research and comply with state-specific registration requirements |
| Building codes and permits | Not obtaining necessary permits or ignoring building code regulations | Research local building codes and secure the required permits |
| Insurance considerations | Failure to inform insurance provider about conversion changes | Notify insurance provider and explore specialized coverage options |
| Compliance with road safety regulations | Overlooking safety requirements such as proper lighting and visibility | Invest in appropriate safety devices and equipment to meet road safety standards |
By disregarding legal and regulatory requirements during your van conversion, you are putting yourself at risk for potential fines, invalid insurance coverage, and even legal ramifications. To ensure a smooth and hassle-free conversion experience, take the time to familiarize yourself with the specific regulations in your area and strive for compliance at every stage of your project.
Lack of Proper Maintenance Plan
Once your van conversion is complete, it’s important to have a proper maintenance plan in place to ensure the functionality and longevity of your van. Neglecting regular maintenance can lead to costly repairs and potentially dangerous situations. In this section, we’ll discuss common errors that van owners make when it comes to maintenance and share essential tips for creating an effective maintenance plan.
Common Maintenance Mistakes to Avoid
- Ignoring routine checks: Failing to perform routine checks on your van can result in unnoticed issues that may escalate into major problems. Regularly inspect your van’s tires, brakes, fluids, and electrical systems to catch any potential issues early on.
- Neglecting fluid changes: Fluids such as engine oil, coolant, and transmission fluid play a crucial role in your van’s performance and longevity. Forgetting to change these fluids at recommended intervals can lead to engine damage and decreased efficiency.
- Overlooking cleaning and detailing: Keeping your van clean isn’t just about aesthetics but also about preventing rust and deterioration. Regularly wash the exterior, clean the interior, and protect surfaces to maintain the value and condition of your van.
- Not addressing minor repairs promptly: It’s easy to dismiss small issues or minor damages, but failing to address them promptly can lead to more significant problems later. Stay proactive and address any repairs or maintenance needs as soon as they arise.
Tips for Creating a Maintenance Plan
To keep your van in top shape, it’s crucial to establish a comprehensive maintenance plan. Here are some tips to help you get started:
- Create a schedule: Set up a calendar or reminder system to keep track of routine maintenance tasks, such as oil changes, filter replacements, and tire rotations. This will ensure that nothing gets overlooked.
- Refer to your van’s manual: Every van is unique, and the manufacturer’s manual provides essential guidelines and recommendations for maintenance. Familiarize yourself with the manual and follow the suggested maintenance intervals.
- Find a trusted mechanic: Establish a relationship with a reputable mechanic who specializes in van maintenance. They can help you with inspections, repairs, and general maintenance tasks, providing peace of mind knowing that your van is in expert hands.
- Invest in quality tools and equipment: Having the right tools and equipment on hand will make it easier for you to perform basic maintenance tasks. Invest in quality tools that are specifically designed for your van’s make and model.
Regular maintenance is the key to keeping your van conversion running smoothly for years to come. By avoiding common maintenance missteps and implementing a thoughtful maintenance plan, you can enjoy your van adventures without unexpected breakdowns or costly repairs.
Conclusion
A successful van conversion isn’t just about creativity — it’s about planning, safety, and avoiding costly mistakes. By steering clear of pitfalls like poor insulation, unsafe wiring, bad layouts, and budget blowouts, you’ll save yourself endless frustration and money.
The truth is, your van build will only be as strong as the foundation you lay. Careful planning, solid materials, and regular maintenance keep your rolling home safe, comfortable, and built to last.
👉 Want to make van life even smoother? Check out our post 50 Must-Have Van Life Accessories You Can Buy on Amazon a hand-picked list of essentials that make living on the road easier, safer, and more enjoyable.
- Van Life With Dogs: Safety, Gear & Real Tips (2026 Guide)
- Van Life Cost Calculator 2025: Estimate Your Monthly Van Life Budget
- Starlink for Van Life: Setup, Costs & Internet Guide (2025)
- 30 Van Life Gadgets Under $30 on Amazon (2025 Guide)
- Van Life with Disabilities: Accessible Campervan Living Tips
- 50 Must-Have Van Life Accessories on Amazon
- Best Vans for Van Life 2025 | Top Conversion Picks
- Top 7 Free Vanlife Campsites in the U.S. (2025 Guide)
- Top 5 Power Stations for Van Life in 2025
 >
>
Leave a Reply